User Guide
Welcome to the SPAM user guide. The main purpose of this guide is to provide our users with the knowledge required to make full use of the application.
To make your experience using the guide more enjoyable, we have prepared the following instructions based on the kind of user you may be.
| I am… | Instructions |
|---|---|
| … a new user | You may want to take a look at the introduction to SPAM to get a better understanding of what the application can do. After that, we suggest following our quick start guide to install and have a tour of the application. |
| … an experienced user | You may want to take a look at the navigation links below to jump straight to the content that you are looking for. You could also make use of the search bar by pressing the ctrl (on Windows/Linux) / command ⌘ (on macOS) and f keys. Alternatively, search for a term in this entire site by using the search feature. |
Navigation Links
Click on any link below to jump straight into that section.
Introduction
This section contains information that serves to introduce you to SPAM and some of its cool features.
Quick Start
This section serves as a quick start guide that includes information on how to install, a tour of the graphical user interface and a getting started tutorial.
Commands
This section contains details about all the available commands that you can use to control the SPAM application.
FAQ
This section contains all the frequently asked questions about SPAM.
Introduction
SPAM (Super Powerful App for Marketing) is a desktop app for managing contacts targeted at marketers who require fast manipulation and precise handling of contact data. It enables marketers to more easily manage and make use of email and phone leads, and minimise tedious and repetitive tasks such as data entry.
Features
Below is a list that highlights some of our special features.
| Feature | Description |
|---|---|
| Data Security NEW | The application data is protected by industry standard AES-256 encryption. |
| Spreadsheets Support NEW | SPAM supports imports from and exports to .csv files, which are compatible with Microsoft Excel and most modern-day marketing software. |
| Contacts Management | SPAM allows you to create, add, edit and delete contacts that are locally stored on your computer. |
Quick start
This section includes all the necessary information that you will need to start using SPAM.
Setting Up
To set up a working version of SPAM on your device, follow the steps below.
-
Ensure you have Java 11 or above installed on your device.
-
Download the latest
SPAM.jarrelease from here. -
Copy
SPAM.jarinto the folder you want to use as the home folder for SPAM. -
Double click
SPAM.jarto start the application.
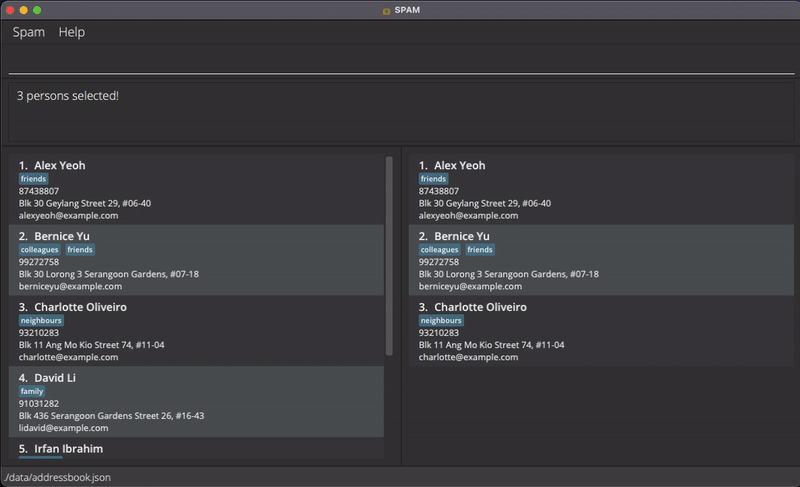
Graphical User Interface
SPAM has a graphical user interface built for you to enjoy easy interaction with the application. This section describes each part of the graphical user interface in detail.
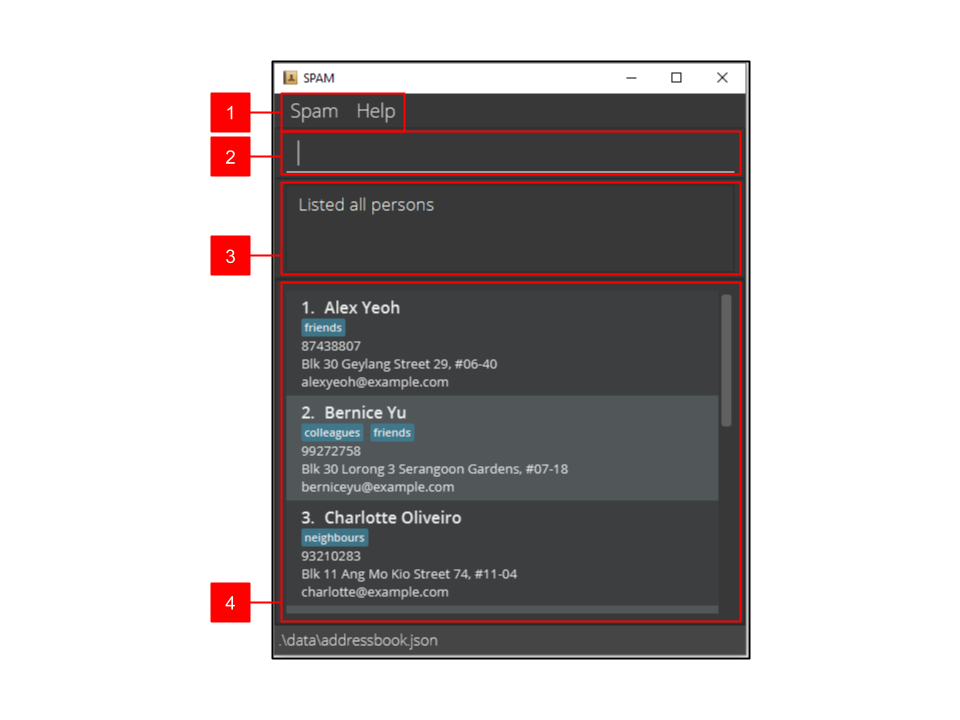
| Label | Description |
|---|---|
| 1 | Toolbar. This is where the settings that allow you to switch between light mode and dark mode is located. There is also a button to exit the application and another button to open the help window. |
| 2 | Command Input. This is where you will type in the commands to be executed by the application. |
| 3 | Command Result. This text box displays the string response from the application after a command is entered. |
| 4 | List of Contacts. This is the list of contacts that are stored in the application. |
Controls
In order to improve your experience when using the app, there are a few features that were added.
| Previous Command | Use the ↑ and ↓ arrow keys to navigate between previously entered commands in the input text box. |
Getting Started
Follow the getting started tutorial steps below to learn more about what SPAM provides.
-
Open SPAM by double clicking
SPAM.jarlocated in your SPAM home folder. -
Since this is probably your first time interacting with the application, you will see a request by the application to set a password. Type in a password and press
enterto continue.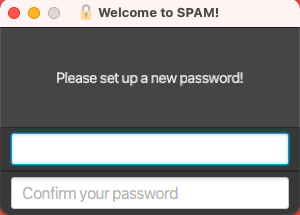
Figure 1: Set Password Prompt Display INFOThis password, which should be known only to you, will be used to encrypt all the information stored in the app.Note that the password needs to follow the requirements stated in the
passwordsection. -
Once you have set up the password, you will be prompted to enter the same password for subsequent logins.
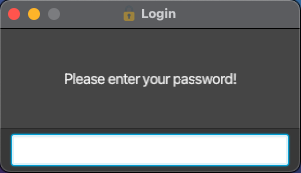
Figure 2: Enter Password Prompt Display -
After a brief period of loading, the GUI similar to the picture below should appear. A sample data will be loaded.
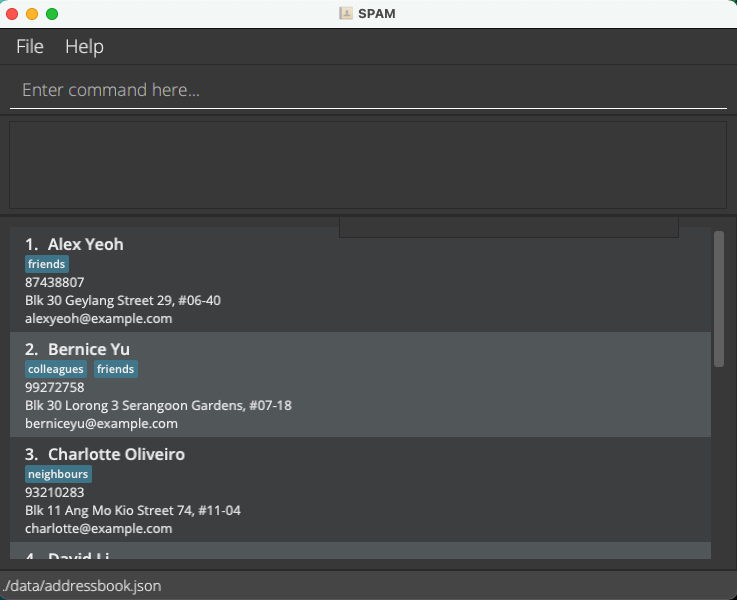
-
Type the command in the command box and press Enter to execute it. e.g. typing
helpand pressing Enter will open the help window.
Some example commands you can try:-
list: Lists all contacts. -
add -n John Doe -p +659875432 -e johnd@example.com: Adds a contact namedJohn Doeto the Address Book. -
delete 3: Deletes the 3rd contact shown in the current list. -
clear: Deletes all contacts. -
exit: Exits the app.
-
-
Refer below for details of each command.
Commands
This section contains details about all the available commands that you can use to control the SPAM application. Click on any command below to learn more about that particular command.
| Command | Description |
|---|---|
add |
Adds a contact |
import |
Import a .csv file of contacts |
list |
Lists all contacts |
edit |
Edits a contact saved |
delete |
Deletes a contact saved |
clear |
Clears all the contacts saved |
find |
Searches for saved contacts that match the search criteria |
select |
Selects contacts |
unselect |
Unselects contacts |
export |
Exports a list of contacts into a .csv file |
exit |
Exits the application |
password |
Changes the password of the application |
help |
Opens up a window that contains this user guide |
Notes about the command format
All commands used to control the application begins with a command keyword.
edit
This is the command that tells the application to edit a saved contact. The command keyword here is edit.
The command keyword may be followed by the command’s parameters based on the specifications of the command.
edit 1
We want to edit the contact with the ID 1. As such, we specify 1 as the command parameter.
Thereafter, the command may also consist of optional flags that specify certain details about the command entered. Both the long form and short form of the flags can be used.
edit 1 --name John Doe
The command here specifies that we should change the name of the contact to John Doe. The flag used is --name. The
short form -n can also be used instead.
add
Adds a contact to the address book.
add
add -n Jane Deer -t woman -t friend
Add a contact with the name of Jane Deer that consist of the tags woman and friend.
Below is the list of flags that can be used with the add command.
| Flag | Long Form | Description |
|---|---|---|
-n |
--name |
Required. The name associated with the contact. |
-p |
--phone |
Optional. The phone number of the contact. |
-e |
--email |
Optional. The email address of the contact. |
-a |
--address |
Optional. The address of the contact. |
-t |
--tag |
Optional. The tags that are associated with the contact. |
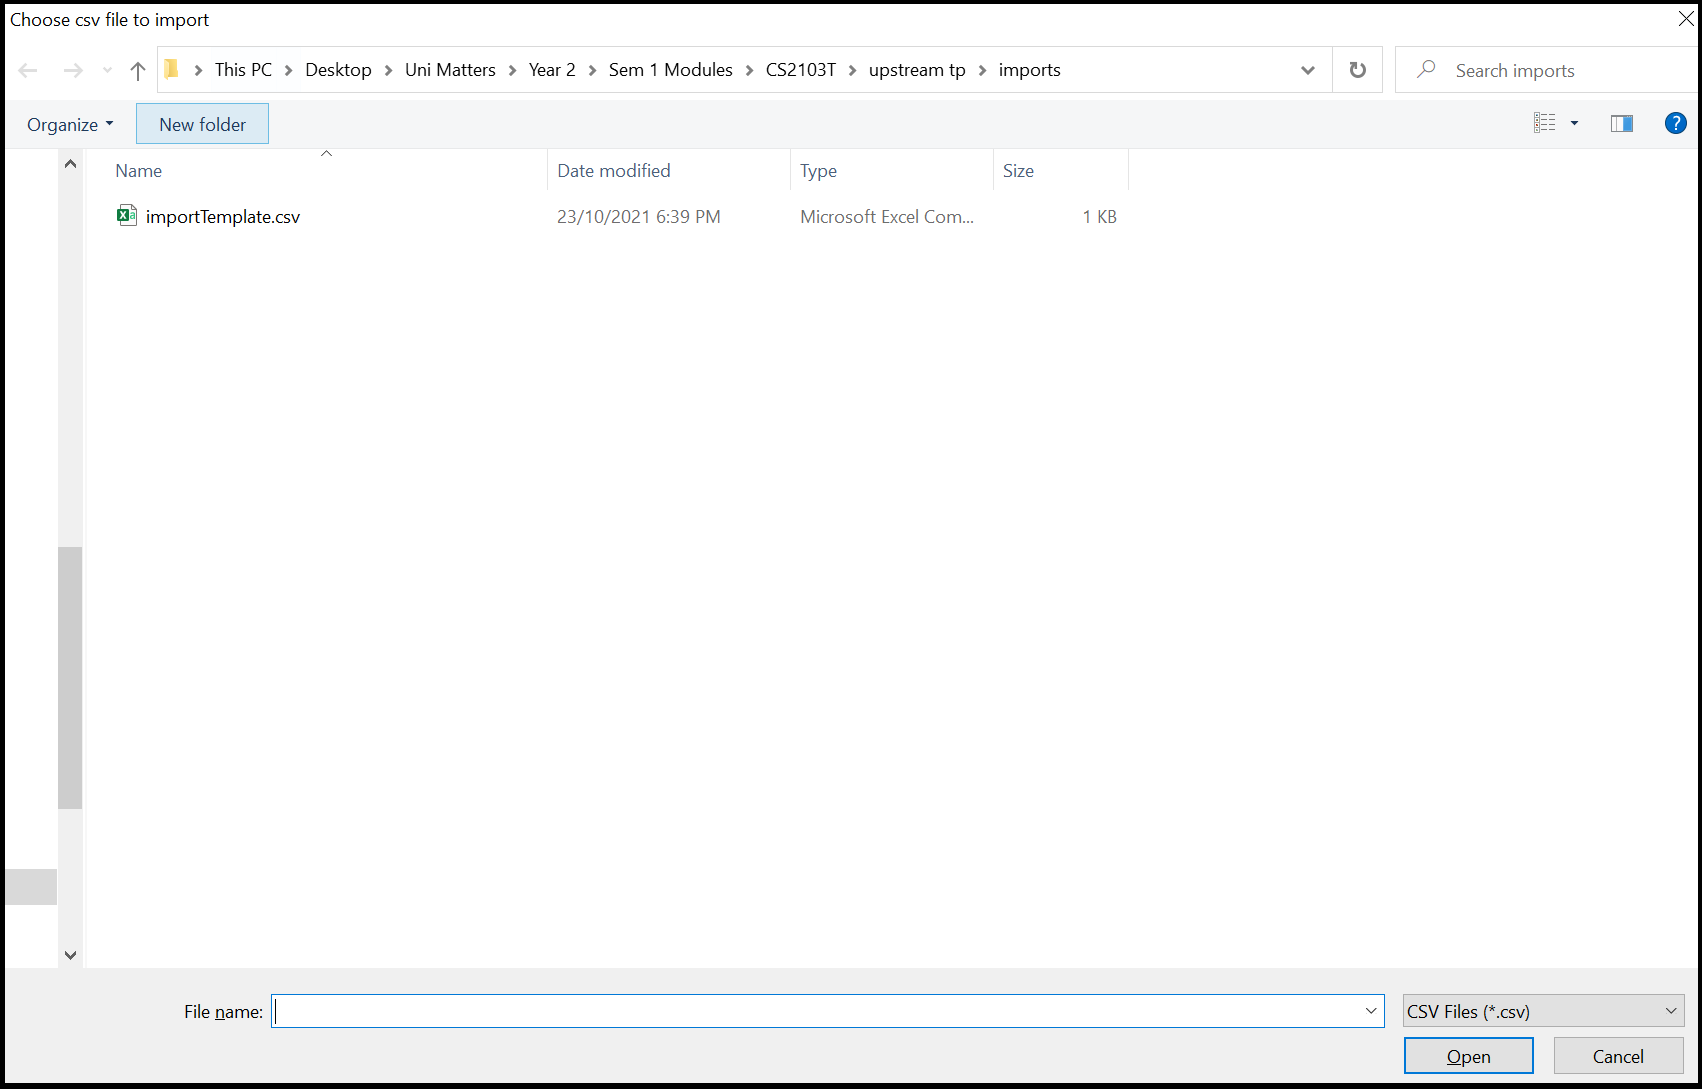
import
Imports all contacts from a selected csv file to ease the transition from excel or other marketing software. Calling the command will open a file browser to help select the file.
import
Example:
- Select the csv file.
- Click open to import contacts.
Note:
-
Csv file should have corresponding headers:
- name
- phone(optional)
- email(optional)
- address(optional)
- tags(optional)
- Multiple tags should be seperated via semicolons (;).
- Make sure to save the spreadsheet data as csv and not csv UTF-8.
- A template importTemplate.csv can be found in the default directory of the file browser.
Valid csv file example:
| name | phone | address | tag | |
|---|---|---|---|---|
| Adam | 81234567 | adam@test.com | ABC, Street | |
| Beth | 620400 | beth123@eg.edu | 123 Drive | friends |
| Cody | 90005000 | Cody@test.org | Oak Lane | mentor;colleague |
list
Shows a list of all persons in the address book.
list
edit
Edits an existing person in the address book at the specified index on the displayed list. The edit command uses the
same flags as add.
- The specified index refers to the index number shown in the displayed person list. The index must be a valid positive integer 1, 2, 3, …
- At least one of the optional fields must be provided.
- Existing values will be updated to the input values.
- When editing tags, the existing tags of the person will be removed i.e. adding of tags is not cumulative.
- You can remove all the person’s tags by typing
-twithout specifying any tags after it.
edit
edit 1 -p 91234567 -e johndoe@example.com
Edits the phone number and email address of the 1st person to be 91234567 and johndoe@example.com respectively.
edit 2 -n Betsy Crower -t
Edits the name of the 2nd person to be Betsy Crower and clears all existing tags.
Below is the list of flags that can be used with the edit command. At least one of the flags must be specified.
| Flag | Long Form | Description |
|---|---|---|
-n |
--name |
The name associated with the contact. |
-p |
--phone |
The phone number of the contact. |
-e |
--email |
The email address of the contact. |
-a |
--address |
The address of the contact. |
-t |
--tag |
The tags that are associated with the contact. |
delete
Deletes the person at the specified index. This index refers to the index number shown in the displayed person list. The index must be a positive integer.
delete
delete 1
Delete the person that is associated with the ID 1.
clear
Clears all contacts from the application.
clear
find
Finds persons whose respective fields (specified by the flags) contain the respective keywords. The find command uses the same flags as add.
- At least one of the optional fields must be provided.
- Only full words will be matched e.g.
Hanwill not matchHans - Persons matching ALL keywords in ALL options will be returned.
find
find -n Alex Yeoh
Returns Alex Yeoh but not Alex Teo.
find -n aleX yEOh
The search is case-insensitive, and will return the same result as the previous example.
find -n Yeoh Alex
The order of the keywords does not matter.
find -t friends colleagues
The above returns persons with both friends and colleagues tags.
find -t friends -t colleagues
Optional fields can be repeated. The above returns the same result as the previous example.
select
Selects contacts from the current list. The selected contacts stay in the selected list until they are unselected. Below
is the list of flags that can be used with the select command in the order of precedence.
| Flag | Description |
|---|---|
-e |
Select all indexes excluding the specified indexes. |
-a |
Select all indexes. |
-i |
Include the specified indexes when selecting. |
select
select -i 1 2 3
Select contacts at indexes 1, 2 and 3 of the list.
select -i 1 2 3 -e 2
Select all contacts except the second contact. Here, although both the -i flag and -e flag has been used, the -e
flag takes precedence. As a result, only the effects of the -e flag is applied.
unselect
Unselects contacts from the selected list. The unselect command uses the same flags as select.
unselect
unselect -i 1
Unselect contacts at indexes 1 of the selected list.
export
Exports all selected contacts to a csv file. The generated file can be found in a folder named exports located in the home folder.
export
export myContacts
Export all currently selected contacts to the file myContacts.csv.
password
Changes the current password.
The flags used in password are as follows:
| Flag | Long Form | Description |
|---|---|---|
-o |
--old |
Compulsory flag. The current password of the application. |
-n |
--new |
Compulsory flag. The new password that the user wishes to use. |
password
Note that:
- The minimum password length is 8.
- The maximum password length is 32.
- Only ASCII Printable characters are allowed. This means that only english characters and symbols found on a standard keyboard can be used.
The prohibited characters are : /, -. Note that password cannot contain blank space.
password -o oldPassword123! -n newPassword!321
exit
Shuts down and exits the program.
exit
help
Opens up a window that contains this user guide.
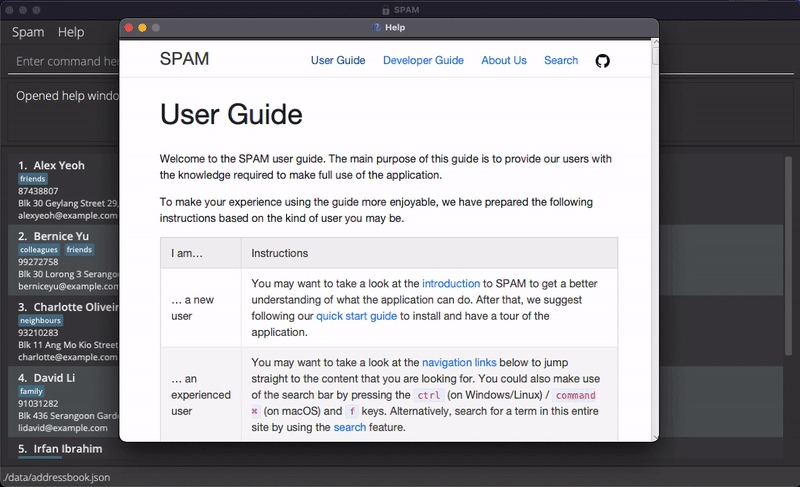
help
FAQ
This section contains some frequently asked questions about SPAM.
How do I transfer my data to another computer?
Option 1: Export all the contacts on your current device into a .csv file. Then, after installing the app in your new device, import the .csv file into the new list of contacts.
Option 2 (with encryption): Move the encrypted file from the application’s data folder in your current device to the application’s data folder in your new device. Start the application and then enter the same password when prompted.
Help, I have forgotten my password!
Unfortunately, there is no way to reset the password. To continue using the application, you need to move the encrypted
data file (located at [location of SPAM.jar]/data/addressbook.enc) to a different location or delete it. The
application will create a fresh data set for you to start over with.
The good news is, the data file stays encrypted and secure regardless! If you suddenly remembered the password you used to encrypt the data, just move the data file back to the original directory and restart the application.